Installing Postfix
First, update the repo to get latest versions
sudo apt update
Now install postfix
sudo apt-get install postfix
You will get prompted with a Postfix Configuration screen. On this screen, select Internet Site. This will pre-fill the config with most of the config needed.
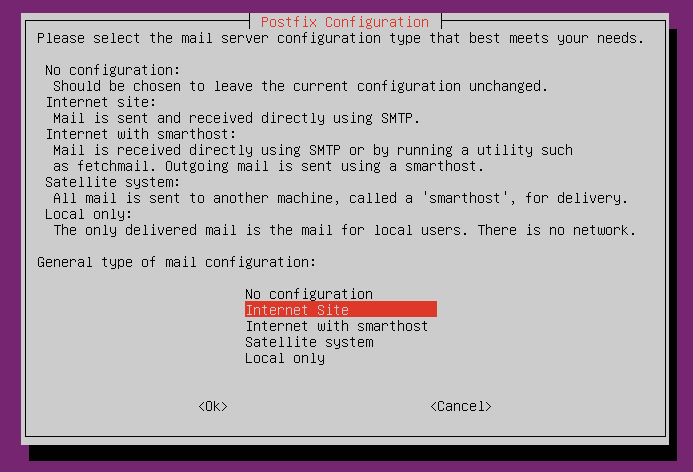
For the system mail name section, just accept the default.
Configuring Postfix
Get your Office 365 relay host by going to https://mxtoolbox.com. Search for mx:exampledomain.com. It will return a domain.mail.protection.outlook.com. Make a note of this.
Open the config file
sudo nano /etc/postfix/main.cf
Find the line that starts relayhost = . Add your mx field from above.
relayhost = domain.mail.protection.outlook.com
In the mynetworks field, add the allowed sender ips, seperated by a space. Change the ip’s to match your environment
mynetworks = 127.0.0.0/8 [::ffff:127.0.0.0]/104 [::1]/128 1.1.1.1/32 2.2.2.2/32
Add the following to the end of the file to enable tls
# logging
smtpd_tls_loglevel = 1
# Allow use of TLS but make it optional
smtp_use_tls=yes
# Disable SSLv2/3 as they are vulnerable
smtpd_tls_protocols = !SSLv2, !SSLv3
smtp_tls_protocols = !SSLv2, !SSLv3
# Insist on stronger ciphers
smtpd_tls_ciphers = high
smtp_tls_ciphers = high
# keys
smtp_tls_cert_file = /etc/postfix/postfix.crt
smtp_tls_key_file = /etc/postfix/postfix.key
Save the file. Now we need to create the self signed tls cert files, we used in smtp_tls_cert_file and smtp_tls_key_file.
openssl req -newkey rsa:4096 -x509 -sha256 -days 3650 -nodes -out postfix.crt -keyout postfix.key
Fill in the prompts with the information about your site.
Once complete, copy over to the postfix directory
sudo cp postfix.* /etc/postfix
Restart the postfix server to see the changes.
sudo systemctl restart postfix
Now send a test email from a network that is in the mynetworks range.